Monday, November 29, 2010

basil butternut squash green chili enchiladas

Are you sick of turkey sandwiches yet? Here is a dish that will bring a little life back to your palate. Thanksgiving has never been a favorite meal of mine unless I have a say in the ingredients (see title of blog for more insight) so I usually push around a small piece of mystery-“turkey” and build mini sandwiches of rolls, mashed potatoes, and green beans, saving plenty of room for pumpkin pie and just enjoying being with friends and family. If you are anything like me, you have been eating (and celebrating) the Thanksgiving feast for over a week. (Yikes for my waistline...) Of course I did traditional Thanksgiving with the family, but then I also baked and sampled pies with friends, tested stuffing recipes and this year there was even a Bobby Flay style throwdown of the Thanksgiving feast along with 20 of my most type-A friends. It was legit; we split into teams, presented our meals and had a (relatively unbiased) judging panel. Thankfully I can report as your esteemed food blogger, my team, “the outliers”, won but it was a strong showing from both teams, and everyone seemed to have won since there were two separate enormous meals. It was a delicious feast!
Speaking of yum: basil butternut squash green chili enchiladas. It’s quite a mouthful but without one of the three things, I am afraid the title would be understated. These are adapted from my mother’s fantastic chicken enchiladas. And, of course you could use chicken in place of the butternut squash, but I find the heat of chilies paired with the sweetness of the squash to be quite delicious, but feel free to experiment! I grew up eating the chicken enchiladas at least couple times a month and they are fantastic as is. :)

Basil Butternut Squash Green Chili Enchiladas
Makes about 2 pans of enchiladas
1. In a large bowl add and let sit:
  • 3-4 oz. of cream cheese
  • 1 chopped onion 
  • 1 c. of your favorite sharper cheese, shredded. I used the Beecher’s raw variety.
  • 2-3 T. of dried basil (you can use fresh, but I actually prefer dried here)
  • 4-6 oz. of sour cream
  • 1 finely chopped poblano chili
  • 1 c. of roasted green chilies (you can either do this yourself by roasting several green chilies, letting them cool, removing the skins and dicing, or using a can of diced green chilies. The Hatch brand is one I have used in the past, but this time I roasted the chilies which was super easy. If you do roast the green chilies yourself, make a fair amount, because about half will be used to go in the enchiladas and the other half will be blended for the sauce that goes on top.) 

    Cubed Butternut Squash (pre-cooking)
    
2. Peel and cube 1 butternut squash and place in a oven pan, seasoning with salt, pepper and a little dried basil. Bake at 350 for 30-40 or roast, whichever you prefer. You just want to cook until the butternut squash is al dente, meaning you can stick a fork it somewhat easily, but not to the point of it being mushy. Let this cool for about 10 min.


Mixture of butternut squash, basil, chilies etc.

3. Add butternut squash to the mixture in the large bowl. Season with some cayenne, salt and pepper to taste.

 4. Fill each tortilla (you will need about 10-12 tortillas, so plan accordingly) with an ample helping of the mixture, roll up and place in an oiled baking dish.


Filing size

 5. Once filled pour 1-2 c. of blended green chili sauce over the top. (You can make the sauce yourself, like mentioned above, or you can “cheat” with a can of green chili sauce. No judgment, which method you use, just know that there are some additives to the chilies and the enchilada sauce that I would not know how to cook with.)

 6. Bake at 350 for an hour. About 10 min. before they are done, sprinkle a little leftover cheese, or if you have a cotija, use a little to melt on top.

Pan #1 of said delicious enchiladas
 Bon Appétit!

Tastes: The competing flavors balance nicely with the heat and sweetness.
Total Prep/Cooking Time: 45 min to roast the green chilies, remove the skins and either dice or blend; 30-40 min for the butternut squash to cook (which could be cooked at the same time as the chilies); 15 min to chop, mix and assemble the enchiladas and 1 hour to cook. Perfect for a dinner when you have other things you are trying to get done around the house.
Total Cost: Exactly $33.71.

As I sat down to write this entry, I realized it has been over a month since I last wrote. For those that are interested in my life outside of writing about, shopping for, cooking, and consuming food, I am happy to report that I landed a new job at the end of October with a small hedge fund here in Seattle. While no job is ideal (because let’s be honest, I don’t know many people actually interested in sitting in an office for 12+ hours a day), it is pretty much exactly the job I wanted when I made the decision to go back to graduate school. It wasn’t wrapped in the beautiful bow that I envisioned and lusted after, but here I am doing what I set out to do. I am hoping I can survive for the time being, learn a ton and eventually see myself going into business independently- rather it will be in food or finance, or potentially both. It has been a really interesting month adjusting to the position, the pace of the office and finding balance in my new life. Because learning about, writing about and cooking food are incredibly important to me, I am going to try and write as much as I can and if there is anything you are interested in learning about or wanting me to test out, please let me know. :) Until next time, happy eating (and investing)!

Tuesday, October 19, 2010

oatmeal buttermilk waffles

oatmeal buttermilk waffle topped with a fresh pluot & real maple syrup
I love lazy Sunday mornings, or for that matter, lazy Saturday mornings as well. Sleeping in and making a delicious brunch are the little pleasures in life that I relish. As I am personally getting ready to switch back into the corporate lifestyle of 5:30am start times, 12+ hour days and high stress environments, I am trying to cherish every moment I have left of being a lady of leisure. Because this change might happen as soon as the end of the week, this morning I treated myself to one of my favorite weekend standby brunches. I got this recipe (and modified it a bit, of course) from an old issue of health magazine. In highschool my mom and I would make these pancakes or waffles on Sundays and load them with fresh fruit and maple syrup. When I made these this morning, memories of being at home with my parents flooded back and made me a bit nostalgic to be with my mom, dad and our charming dog, Trixi.
 
For this recipe, make sure and get real oatmeal . I prefer to pick up old-fashioned rolled oats in the bulk section at whole foods. It is usually pretty cheap and very minimally processed. The instant stuff in often highly sweetened and processed, which lowers the vast health benefits of the oats. And what health benefits you ask? Oatmeal is loaded fiber (55/45 soluble to insoluble), has a ton of heart-hearty antioxidants and even stuff that helps out your immune system.
 
Is that enough to sell you on some oatmeal waffles, or did you happen to see that there is buttermilk involved too?? Buttermilk is one of those things that I have in my fridge every so once in awhile. I made some red velvet cupcakes this past weekend that called for it so I was excited to have some leftovers for my beloved waffles. No matter if you want to impress your soon-to-be inlaws or potentially even an overnight date, this is something that is super easy, tastes great and looks beautiful. :P

Oatmeal Buttermilk Waffles (or Pancakes)

1. Combine 1 ½ c of rolled oats with 2 c of low-fat organic buttermilk (I love the organic valley brand, but use what you like best). Let this sit for 20 min and set aside

Pre- 20 min soak.
Post 20-min soak. Notice how the oats soaked up the buttermilk.
2. In another large bowl, sift 2 T brown sugar, ½ t salt, ½ c flour, ¼ t grated nutmeg, and ½ t baking soda. Sometimes the brown sugar will not sift through, but this is not necessary a bad thing. You basically just want it to stick to the flour and not clump with itself. So if it is still sitting in the sifter once everything else has gone through, feel free to just throw it in the bowl as long as it dried out a bit with the flour.
3. Add 2 large eggs, 1 t vanilla, 3 T canola oil. Mix this all together well.

slowly folding in buttermilk & oats
4. Now fold in rolled oats mixture. DO NOT OVER MIX. I have screwed this up before and my pancakes/waffles had no lift in them. I would say it takes no more than 5-6 folds to get the two mixtures combined.
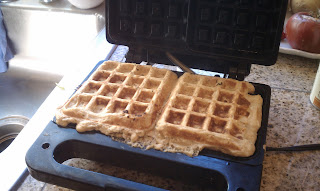
5. Now either use your waffle maker or skillet for pancakes (I prefer a non-stick or even a castiron). I like to spray the pan or waffle maker with a little canola spray to get the crisp on the outside, but I don’t think it is at all necessary if the surface is nonstick.
Makes: about 8 waffles


any waffle iron will do!
I like to top these guys with fresh fruit and real maple syrup. I also love a little greek yogurt on there too with perhaps a little honey and some sliced almonds. In the summer, if you get fresh berries, these are always great, and beautiful to boot. If you are feeling like something for sweet and decadent, nutella and bananas are always a great option, just warm the nutella up a bit and drizzle on some sliced bananas over the waffles or pancakes.

waffles with fresh blueberries
Bon Appétit!

Tastes: Very light and wholesome with a slightly nutty taste from the nutmeg. Yum.

Total Prep/Cooking Time: 30 min, including 20 minutes of the rolled oats sitting when I got the other stuff ready.
Total Cost: Exactly $5.47. As suggested by one of my readers, I have put together an spreadsheet to track the exact expenditure based on ingredients I buy down to the unit of measurement. When I figure out to upload excel files, I will show you the method to my madness. :)

Monday, October 18, 2010

two in a bowl

Two in a Bowl: Pumpkin & Potato Leek Soup
What’s better than one soup? That’s right. Two soups… in the same bowl. For some, this might just be the adventure you need to take. It’s kind of amazing. The night after I made pumpkin soup, I decided to make another batch of it (because it was just that good) and also give AW’s potato leek recipe another go. The last time I made it, it turned out a bit thick as I think my potato-to-leek ratio was a bit off. This time though I think I got it just right, and am excited to share it with you all!

When it comes to cooking with leeks, I think it is all about having enough leeks (which I have often not gotten enough of) and being able to pick out good ones at the market. If you are new to cooking with leeks, don’t be scared of them, they are really just a sweeter version of an onion. When you go shopping for them, aim to pick out the ones with the longest white stalk, because this is part you are going to cook with. All the green leafy-sides can be put aside for vegetable stock, but when a recipe calls for leeks, more often than not, it is calling mostly for the white part. (Check out the link to the magic leek soup below to see how to properly cut and wash leeks.)

I think of leeks as a bit of a superfood. Besides being the only ingredient in the magic leek soup of Mireille Guiliano’s “French Women Don’t Get Fat” book (also great when you are in the need of a little detox), they are also loaded in nutrients. (On a personal note I will be resorting to this detox soup after the upcoming Seattle Restaurant week where I plan to eat my way around the city.) From a nutritional perspective, leeks contain active substances (allyl sulfides) which block the action of hormones and chemical pathways within the body that promote cancer. Regular consumption of allium vegetables (onions, garlic, shallots, leeks etc.) are also associated with a reduced risk of both prostate and colon cancers, decreased tendencies for blood clots to form and lower levels of LDL (the bad) cholesterol. Leeks are also a good source of the most important carotenoids for eye health (lutein and zeazanthin)… so basically, eat your leeks…

Potato & Leek Soup

1. Trim off the root end and the upper greens of the leeks (see picture) and quarter halfway down the leek so in order to wash off any dirt from the outside and inner leek sections.
2. Wash off the leeks in water
3. Cut up about 3 pounds of leeks (I purchased 3.15 lbs and somewhere between 4-5 medium width leeks) which should amount to about 4-5 full cups of thinly sliced leeks. Set aside.
4. In a heavy-bottomed pot (I used my dutch oven), melt 3 T. of butter. (You can use unsalted or salted here, not an issue).
5. Add 4-6 springs of fresh thyme (if possible) removing the leaves by moving your fingers backwards down the bark. Also add 3-4 bay leaves. (Remember how many bay leaves you put in, because you will need to fish these out later.) Let these mix up with the butter for a minute or two, then add leeks.

6. Cook for about 10 min. Then add about 4 cups of coarsely diced yellow potatoes (about 1 pound). AW says to peel them, but when you do you lose a lot of interesting texture to the soup, not to mention a lot of nutritional value.So I leave the skins on...
7. Cook for about 4 min, then add about 5 cups of water, bring the soup up to a boil, then turn down to a simmer for about 30 min, or until vegetables are tender. Fish out bay leaves after the 30 min.
8. Once done, use a hand blender (or normal blender in batches) to puree the soup to your desired consistency, then season with lots of good salt and cracked pepper.
9. Some people suggest adding a 1/3 of crème fraiche or heavy cream, but I have tried it like this and don’t think it makes a difference. I suggest not using any cream the first time making it.

You can serve this as a “two-in-a-bowl” as previously suggested or perhaps on its own. While it is an excellent soup to take to work as leftovers, or just to have for dinner, I would suggest if you are feeling sassy, you should jazz it up with some white truffle oil. You don’t need much at all, but a drizzle on the top of the soup just adds that some extra, and might make you fall in love with white truffle oil forever. I use the Bartolini brand that I get down at La Buona Travola in Pike’s Place.

Potato Leek Soup with White Truffle Oil

Bon Appétit!

Tastes: Amazingly rich despite no addition of cream. I think the three keys to this soup are your potato to leek ratio (more leeks, more flavor I find), lots of salt and cracked pepper and heavy pureement of soup with the blender. Yum.

Total Prep/Cooking Time: 55 min, including 30 minutes of it just simmering
Total Cost: Exactly $9.45 + bay leaves & thyme (both of which I grow) but I would assume perhaps another $5 for these and you will likely be left with extras.

Wednesday, October 13, 2010

fall in love with fall

Fall is a magical time of year. The weather changes in such a romantic way that all I want to do is go for long walks in my fleece embracing the crisp breeze and later cozy up with a blanket and a good book at night. As traditionally a creature of summer, complete with fresh berry picking and lazy days on the lake lounging with coronas, fall this year has presented a fun challenge for me. Since I have always favored summer berries, tomatoes and whatever bounty has risen from the garden, this year I have been trying to get to know all the wonderful things coming into the farmers market this time of year: all sorts of root vegetables, squashes, pumpkins etc. This has led me to literally been falling in love with the autumn harvest. Today, being that pumpkin might just be my new single favorite vegetable, I am going to share with you this fabulously delicious and easy recipe for pumpkin soup.
A few words about cooking with pumpkins, make sure to buy the “sugar pie” variety. Any farmers market will be selling these ones, but just don’t expect to go to the store and use the same ones that we carve crazy faces and designs into. It won’t taste very good. It would be like the time I was trying to make mojitos and accidentally picked grass that looked like mint. The resulting mojito ended up resembling something close to an alcoholic wheat grass drink. Lesson learned!

Pumpkin Soup with Sage & Gruyere Croutons

1. Melt 2.T of unsalted butter in a heavy-duty pan over medium heat (I used a dutch oven).
2. Add 1 medium chopped onion, and stir around, cooking until tender. About 6-8 minutes.
3. Add 6 cups of diced, peeled and seeded pumpkin (no need to roast), 4 cloves of minced garlic and cook for another minute or so.
4. Add 1. cup of a dry white wine (I used a Reisling), but don’t open something new unless you need to, and if you need to, pour yourself a glass while you are at it! Also add 8-12 minced sage leaves.
5. Once the wine has evaporated, add a about 3 cups of broth. I prefer a homemade vegetable or chicken broth, but the easiest thing is probably one of the cartons.
6. Cover and keep soup at a simmer for about 25 min, or until the pumpkin is tender.
7. Once done, add ½ c. (more or less) of some shredded Gruyere cheese.
8. Using a hand blender (ideal) or blender, puree the soup (doing this in batches if using a blender; also, don’t completely fill the blender because with a warm soup, you could end up in a world of hurt).
9. Return soup to a simmer, and depending on your taste, add more broth if you like your soup thinner. Add any salt and cracked pepper to taste (I added a lot).
10. Turn on your broiler and position a few slices of bread (depending on how many you are serving) on a baking sheet, turning every 1-2 min to toast, then adding some of the leftover shredded Gruyere cheese and a few leaves of minced sage. Season with a little salt and pepper and broil until cheese is bubbly.
11. Serve in bowls with a slice of the crouton.

Bon Appetit!


Total Prep/Cooking Time: 35-40 min
Total Cost: roughly $10-$15
This recipe is an adaptation of one feautured in fine cooking No. 107.


Stay tuned for whatever else my love affair with fall leads me to!

Tuesday, October 5, 2010

milk and cookies

After an invigorating yoga class tonight, I found myself craving something sweet. I tried to think what I wanted that wouldn’t be a sugar rush to be followed by a later headache, and something mildly good for me. My favorite dessert in the world is Tiramisu (hello cream) and someday I will teach myself how to make a fabulous one, but today was not that day. Actually two of my favorite friends have attempted this fabulous dessert recently, and both have turned out incredibly boozy. While I would never complain about such offenses, every bite felt like I was taking a shot, and that’s not really what I was looking for tonight, or willing to take a chance on.
What better to go with my already published raw-milk-soapbox-rant earlier today than cookies?! Yum :) In college, while I was busy not-studying, I developed my own recipe for chocolate chip cookies. My boyfriend at the time was a bit of a cookie fiend and being the cutsie girlfriend that I was, I wanted to impress him with the best chocolate chip cookies he had ever had. (Somewhat ridiculous now thinking about it…) Nevertheless, they were full of refined white sugar, excessive butter and bleached flour. Don’t get me wrong, they were fantastic but as I was sitting down trying to think of what to make tonight, it dawned on me: a slow cookie, or one that meets most, if not all of the requirements of the slow food movement (ie. what this blog is supposed to be doing in the first place!) would be fantastic to have on hand.
 So I scoured the interwebs looking for cookie recipes that were low in sugar, used natural (and local) ingredients and looked delicious. I modeled my recipe after the one I found at peace, love and muesli (fantastic blog), and used some cookie techniques I learned when I was on my cookie conquest in college. Here is what I came up with:
1. Preheat oven to 350 degrees F
2. Cream 1 cup of unsalted butter in an electric mixer
3. Add 1 ½ cups of brown sugar and mix until fluffy
4. Add 4 eggs, then 2 ts. of vanilla, while mixer is running on low.
5. In a separate bowl combine and mix together:
  • 2 ts. of baking soda
  • 2 ts. of baking powder 
  • 1 ts. of salt 
  • 3 ½ cups of whole wheat pastry flour (see later blog-soapbox-rant on flour) 
  • ½ c of ground flaxseed meal 
  • 3 c. of raw oatmeal 
  • 1 c. of coconut flakes
6. Now slowly add this mixture to the electric mixer
7. Add in about 8-10 oz of dark chocolate chunks. I broke up a Theo chocolate bar (some of the best chocolate around and conveniently less than a mile away) with 70% cacao. Then also add a few handfuls of semisweet chips or pieces of a broken up bar, maybe 4-5 oz.
8. I scooped them onto my baking pans then pressed them down a little since it is a pretty thick batter and I wanted a flatter cookie.
9. Cook for 10-12 min or until very lightly brown.

So there you have it, a cookie that is delicious, nutritious and relatively “slow”. Looks like I will be enjoying a midnight milk and cookies snack!

Bon Appetite!

Total Prep/Cooking Time: Mixing dough: 20 min & baking: appx 1 hr, but it depends on how many cookies you get on your baking sheets, and how many baking sheets you have.
Total Cost: roughly $10-$15

Monday, October 4, 2010

got raw milk?

Do you ever look at the vast choices of milk options and are TOTALLY confused?? Which is best? Organic vs. non-organic? Local vs. mass producer? Do you know what is in (or not in) the milk that you eventually choose? Having faced my own confusion in the dairy section, I put together what I think are the most important factors when making my milk decision (after much research of course). You might not think you drink much milk, but it can add up quickly (morning latte, soup for lunch, various sauces, ice cream, etc.) Hopefully you find this as helpful as I did learning about it…
  • If you drink any milk at all, it likely comes off of a factory farm like we have all seen in Food Inc. The cows being milked there are feed a diet full of corn, causing them to often get incredibly sick, as their bodies are not designed to ingest a diet full of corn. Awhile ago, the food scientists in our country figured out that if we gave them certain types and amount of antibiotics, they would get sick less often. Further they figured out too that if we injected them with various hormones, they could produce 2x and 3x even more milk than what their bodies were built for. It seemed fine to everyone at the time. The demand for massive qualities of milk, cream and butter was there, and being the resourceful and capitalist Americans we are, we found a way to make something more efficient. But what are the consequences of such antibiotic and hormone supplements? They wind up in our bodies, because after all we are what we eat. There have been studies that have linked cases of certain cancers, early puberty, testicle shrinkage, sterility, liver damage and even fetus damage with the hormones and antibiotics in our meat. And the kicker is, there is no regulation that lets us know how much in being pumped into the cattle. Think of this the next time you pick out that $2.99 gallon of milk at WalMart, Costco or Safeway…
  • The grass-fed diet for cattle is incredibly important from a nutrient perspective. Milk from grass-feed cows contains higher levels of cancer-fighting CLA (conjugated linoleic acid), vitally important vitamins like A & D, and healthy enzymes designed to help the body assimilate all the nutrients, predominately calcium. These enzymes found in raw milk are critically important for preventing and recovering from disease for people of all ages. Further the omega-3 fat content of grass-fed, pasture-roaming cows has been found to be as high as 50% (it’s virtually nonexistent in factory-farmed, corn-fed animals).
  • What about organic milk? As defined by the USDA, milk and milk products can be labeled "organic" if the milk is from cows that have been exclusively fed organic feed, are kept in pens with adequate space, are allowed periodic access to the outdoors and direct sunlight, are not treated with synthetic hormones and are not given certain medications to treat illness. As you can see, there is a lot of wiggle-room here. The cows can be fed organic corn, not be squeezed SO tightly together and live in an indoor pen with perhaps a small door letting cows go outside that the cows choose never to use. That doesn't seem much different that the factory-farm to me... Organic for dairy is a lot of fancy marketing to charge a much higher dollar for an item that is only so-so better for you, and sometimes it might be worse (see below on ultra-pasteurization).
  • Pasteurization is basically the process of heating the milk to high temperatures (appx. 160 degrees F or higher), aimed to eliminate “harmful pathogens, enzymes and bacteria” in the milk and extend the shelf life. But along the way of killing potential harmful bacteria etc, most, if not all of the good stuff is destroyed as well.
  • Do you ever sit at the grocery store and notice the massive difference in “fresh-dates” on organic vs. non-organic milk? Because of the likely massive production of the milk, the producers often pasteurize at a much higher temperature (often twice as high), which eliminates literally ALL of the good bacteria and enzymes, but significantly extends the shelf life. You can read about ultra-pasteurization here.
  • Homogenization on the other hand is just the distribution of cream throughout the milk, making sure that the cream does not rise to the top, and that the milk is consistent throughout. This process is also done at high temperatures and is consistently thought to increase heart disease in addition to being completely unnecessary. You can weigh the pros and cons here. I like the guy’s article title of the pro stance: “Homogenized Milk: Rocket Fuel for Cancer”…
  • While it’s always possible to get sick from any contaminated food, raw milk seems to be unfairly singled out as a health risk. According to the Weston A. Price Foundation (very cool organization), although raw milk has always been for sale in California, except for a brief period in 1900, there has NEVER been any issue, while there have been numerous instances of contamination of the pasteurized style. The health regulators have followed it incredibly closely (as most of their interested are aligned with major dairy companies) and not even a signal incident was reported, this is literally millions and millions of gallons of consumed raw milk. I do understand that comparatively, there are like 1000x more non-raw drinkers over this time period, but don’t you think its kinda amazing that there was NEVER any issue? There are numerous other studies with the same findings.
  • And local is not always better. I called up a local creamery a few months ago that frequents the local farmers markets to learn that they fed their cows a considerable about of corn and further reserved the right to administer antibiotics if they their cows got sick. I wanted to ask them if they had ever stopped feeding the cows corn, but I resisted the urge to be a complete brat. ;)
So what to do now? I strongly believe that raw, organic, unpasteurized and unhomogenized milk is one of the best health foods out there that we can put in our bodies, so much so that I am starting a trial period of this type. See, I have been using raw milk from Sea Breeze Farm lately to make my own yogurt which has turned out to be quite delicious. So I am going to try out a full switch. Yes, I will be using raw milk in my other culinary adventures and morning latte, which has traditionally been non-fat organic milk. Wish me luck! I have to say, that this morning's latte turned out quite well... :)

Cheers to raw milk!

 
If you would like to read more about raw milk, check out these sites:
http://www.raw-milk-facts.com/
http://www.realmilk.com/

Wednesday, September 29, 2010

Peace Through Pesto Pappardelle

It’s been a little while, well about 2 weeks to be exact, since I last wrote. To get a little personal here, my mind has been absolutely consumed by the sheer thought of moving away from Seattle, (where I would live, how I would live etc.) and at the time the idea of sitting down to write about slow food and cooking was like pulling teeth. See, I was really upset about it all and couldn’t figure out why, until I realized last week that I actually don’t have to move if I don’t want to. I know that sounds a bit crazy with how simple it is, but I never really gave myself that option. The truth is, is that I have been working so hard for the past two years to elevate my career and “make something of myself”, but along the way I lost sight a bit of my personal priorities and suddenly my career objectives became bigger and bigger, and morphed into something was definitely not me. Anyway, long soul searching story short, I have basically taken the past few weeks to concentrate on what makes me happy, one of which is cooking (I think the full list is cooking, yoga, friends/family and love, but that is a blog post for another day). So I have cooked, and cooked, and then cooked some more, some nights until the early hours of the morning. (Seriously, I was up until past 2am the other night roasting tomatoes, ridiculous!) I have made salmon, scallops, crab cakes, homemade pasta, tomato sauce, pesto, scones, quiches, crepes, frittatas, jam, jellies, cookies and ice cream, as well as pickling fresh beets, carrots, onions and zucchini. I even revived my herb garden and planted a fig tree! Cooking and all the steps leading up to cooking (sourcing, shopping etc.) is like a form of mediation for me. In a way, my personal mini-crisis is your gain and I am so happy to share all the tips and ideas with you! I have also thought a lot about what I want to do with this blog. I would like to continue to share recipes but also I would love to share also some of the interesting things I have been learning more about, like, how safe is raw milk? And what are the health benefits? And is the type of milk that is sold in the stores actually good for us? Anyway, l have learned that I have some very serious “hippie-tendencies” (as a few girlfriends like to tell me) and I will write about them here if you are game. But for today, pesto and pasta….

First up,

Pesto Pappardelle

I honestly do not know how Alice Waters does it. She lives without a food processor, mortar and pestle only. When I read this, being the AW devotee that I am, I thought, well if Alice can make delicious and amazing food with only a mortar and pestle, so can I. So I bought a beautiful mortar and pestle and was excited to try my hand at it with pesto, a la AW.

It did not go as well as planned. Pesto is NOT a hard thing to make. You have 6 basic ingredients (or 5 if you omit the pine nuts): Basil, garlic, salt, pine nuts, parmesan cheese and extra-virgin olive oil, and it is all about getting these things in the right proportions. (I am a firm believer in the fact too that if you grind garlic too long in the food processor, it can become bitter, so watch out for that.) However, my end product using the mortar and pestle seemed to resemble some sort of dark fern smoothie.

Alice’s recipe goes like this:

1. Grind 1 garlic clove and some salt together in the mortar and pestle
2. Add ¼ c. pine nuts and continue to pound
3. Add ¼ c. of parmesan cheese and pound
4. Transfer this mixture to another bowl
5. Take 1 c. of lightly packed basil leaves and coarsely chop
6. Put basil leaves in mortar and pestle and pound to a paste.
7. Add back pine nut mixture and gradually pour in ½ c. of extra virgin olive oil
8. Taste, and add more salt if necessary.

This might sound easy enough, but let me assure you, it is not. Step six of grinding the pesto leaves to a paste did not work out so well for me. Maybe I am just weak and Alice has more upper body strength than me, but I found this impossible. Everything else worked well though. I added about 4 garlic cloves instead of just 1, and I doubled the amount of parmesan cheese (bc, why not?).

Later when I made a second attempt at this pesto, I used a food processor for step 6, along with the substitutions I mentioned and the pesto turned out as pesto should! Beautiful and bright green (I swear its much brighter, the right side one that is, than this picture shows!) Not, some crazy mixture of dying basil leaves…

 And clearly, what better to eat with fresh pesto? Uhh.. but fresh pasta of course!! And this is an easy-as-pie recipe that I think we have mentioned before of simply flour and eggs. I mixed up 2 whole eggs and 2 egg yolks (all room temperature, very important) and basically added bit by bit of to 2 c. of white unbleached flour that I had mixing in my handy-dandy mixer, until everything was incorporated. Once incorporated, I kneaded the dough a few times on a floured surface and set aside in plastic wrap for an hour or so.

Later I rolled out the dough, separated it into 3 or 4 long rectangular strips and used my new pasta maker to roll out some lasagna sheet and cut them into long large noodles (which were borderline too big), but nonetheless, they turned out beautifully and I ate a batch with both the sad basil-death pesto, and the beautifully crisp and fresh basil. You can make your choice as to which one looks more appetizing!


Bon Appetite!


Total Prep/Cooking Time: Pesto: 15-20 min & Pasta: 10 min + 1 hour of pasta sitting + pasta kneading/rolling/cutting and cooking 30 min

Total Cost: roughly $15-20